Set up ‘Notify me’ button on your store
Get started with Restock Rocket

Kartik
Last Update 2 jaar geleden
When you install Restock Rocket, you'll be prompted through the steps required to get the 'Notify me when available' button appearing on your store's product pages. To go through the set up process, install the app through the Shopify App Store or click on this link to begin the onboarding setup - Welcome to Restock Rocket
Restock Rocket requires you to enable the theme extension associated with it on your store to get the button showing up. Click the purple "Open Theme Editor" button to open your store's theme editor and activate the Restock Rocket extension.
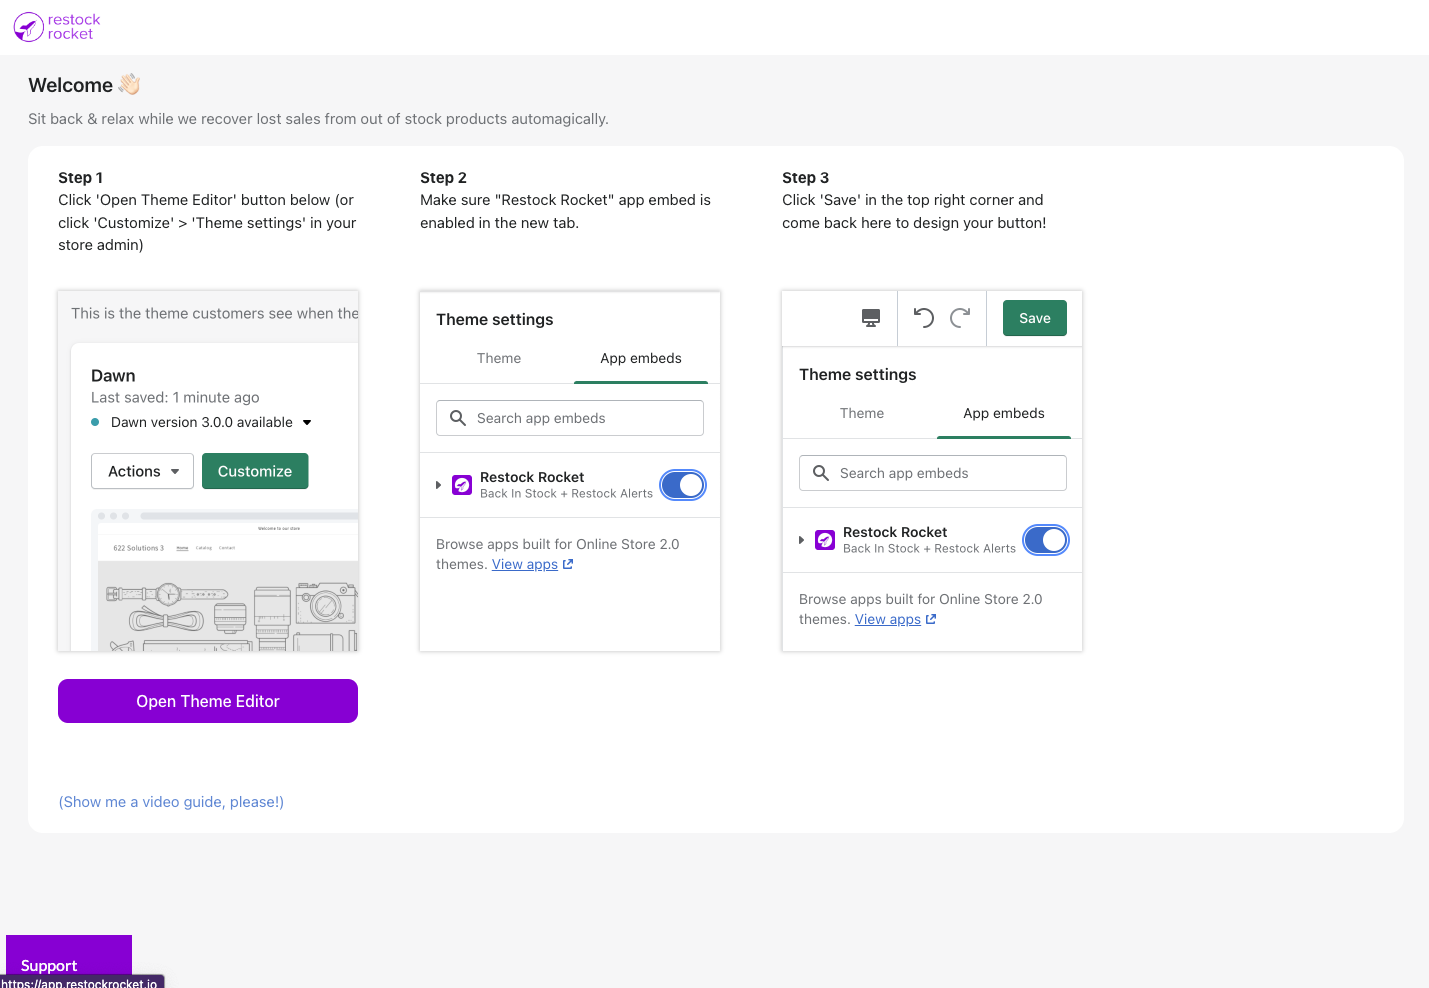
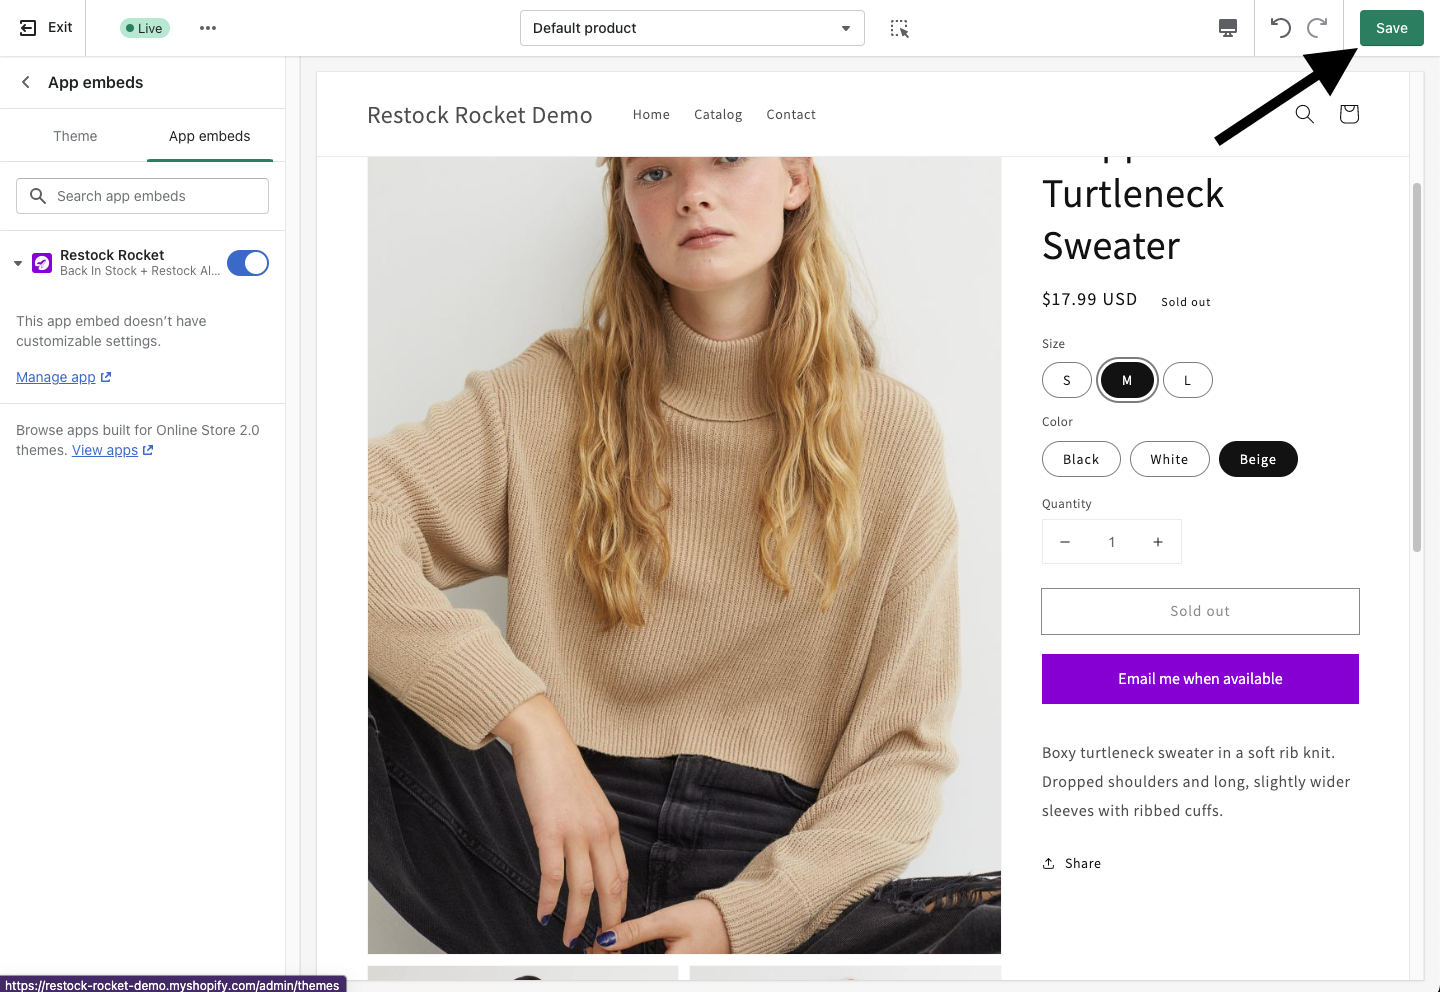
In the new tab, make sure the "Restock Rocket" toggle is enabled in the "App Embeds column and then click "Save" in the top right corner of your screen.
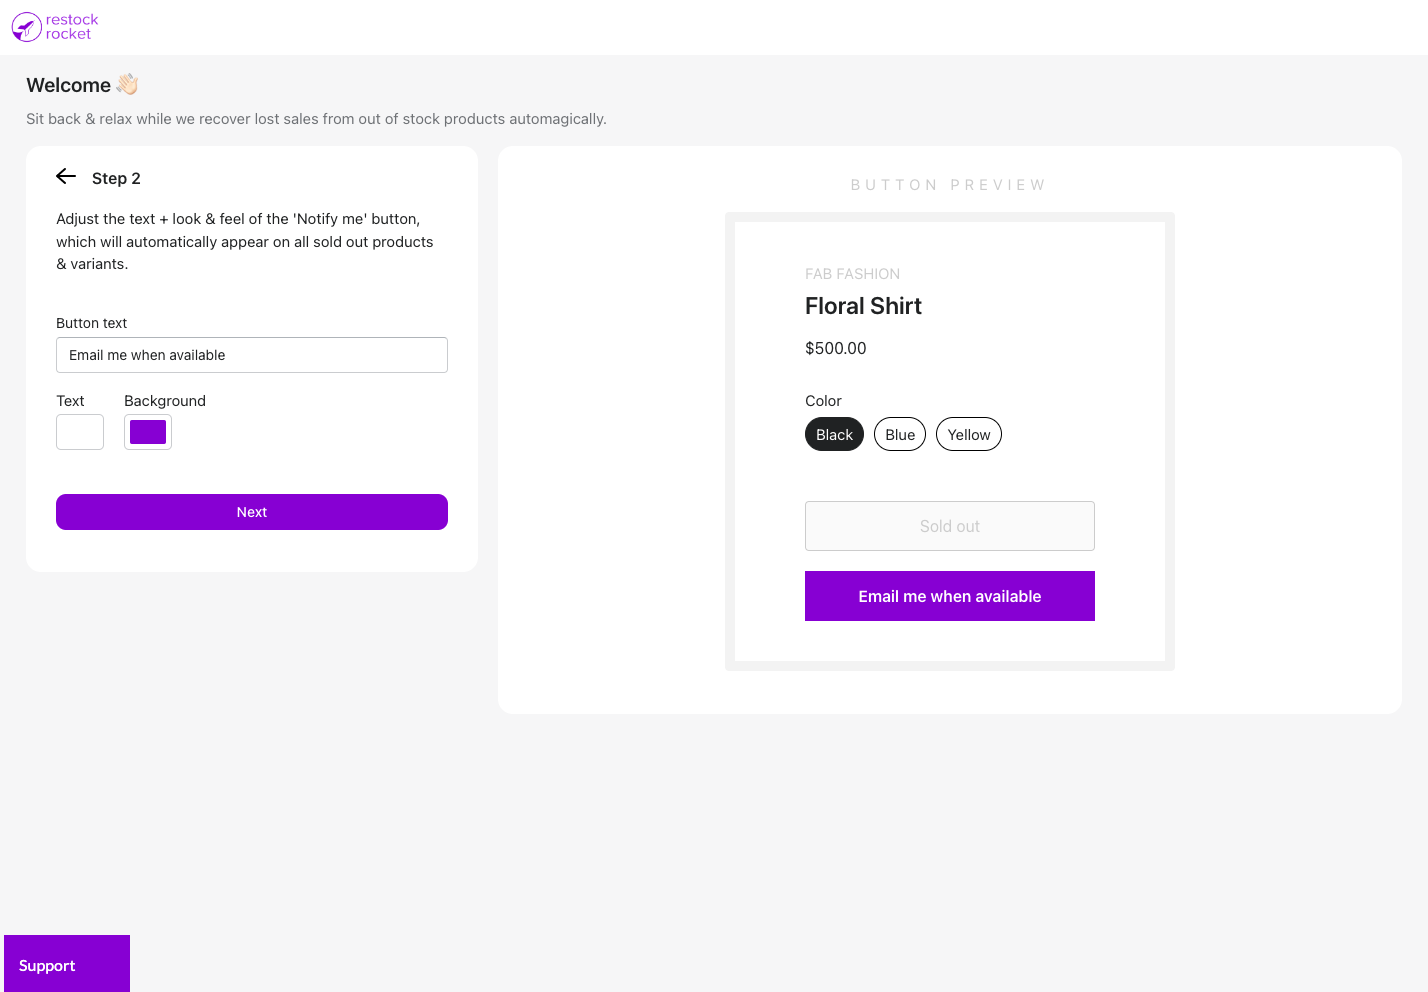
Next, come back to the Restock Rocket tab on your browser and click the purple "Continue" button. You'll be guided through setting up the button text & colors.
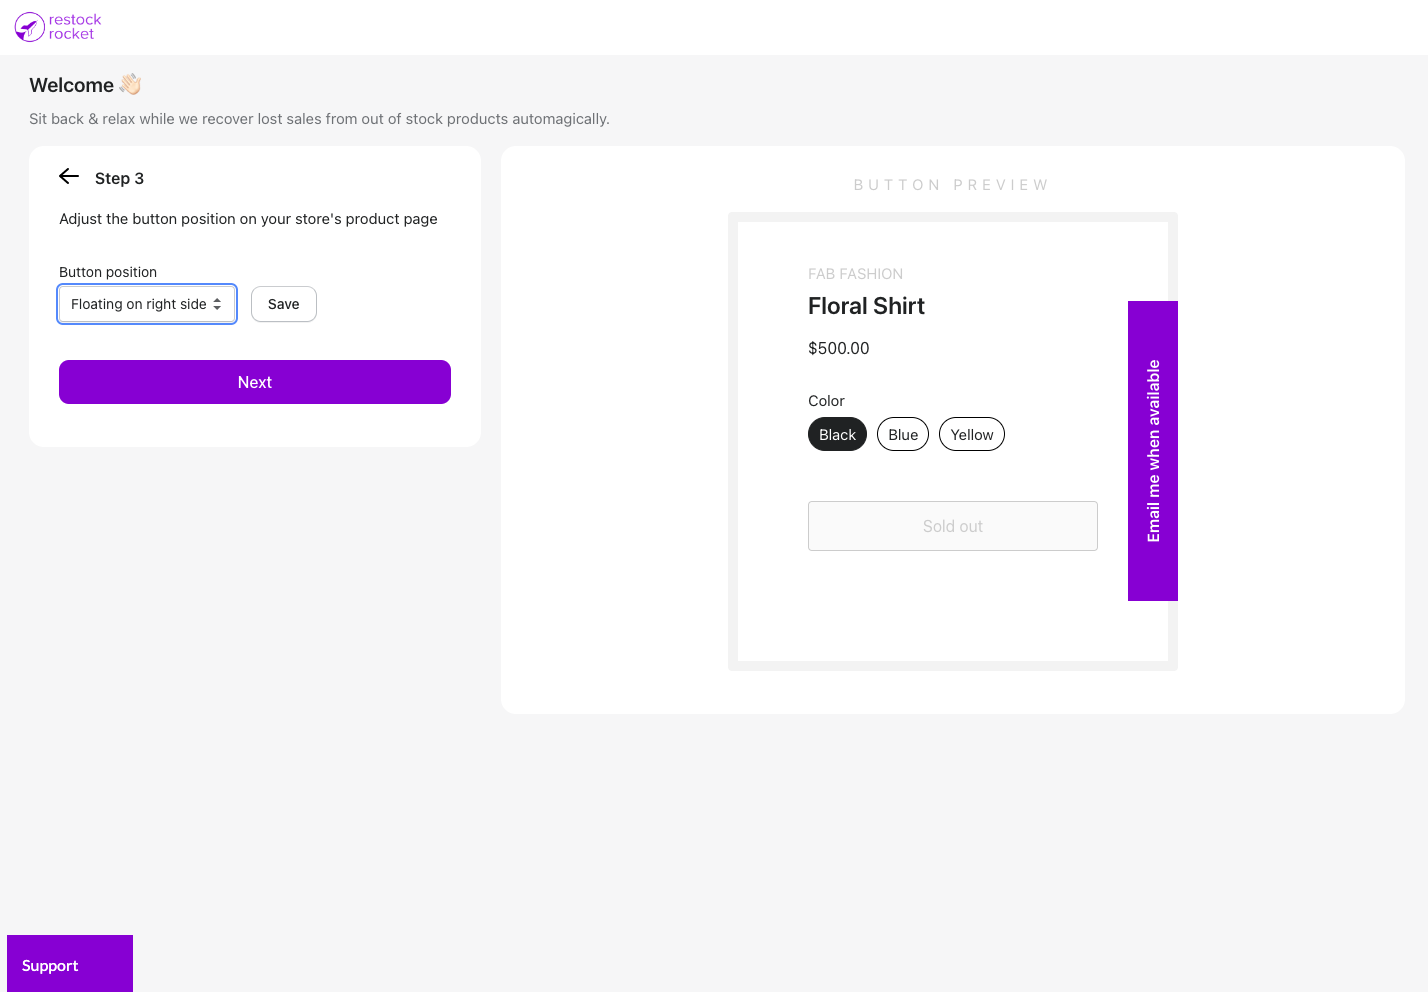
By default, Restock Rocket shows the "Notify me when available" button on the right side of your screen. But you can change this to another location and also have it shown underneath the "Sold Out" button. To see your available options and configure the position correctly, make sure to see this button position guide - Change 'Notify me when available' button position

Next, select the channels that you'd like to send back in stock notifications from. Restock Rocket supports SMS & Email.
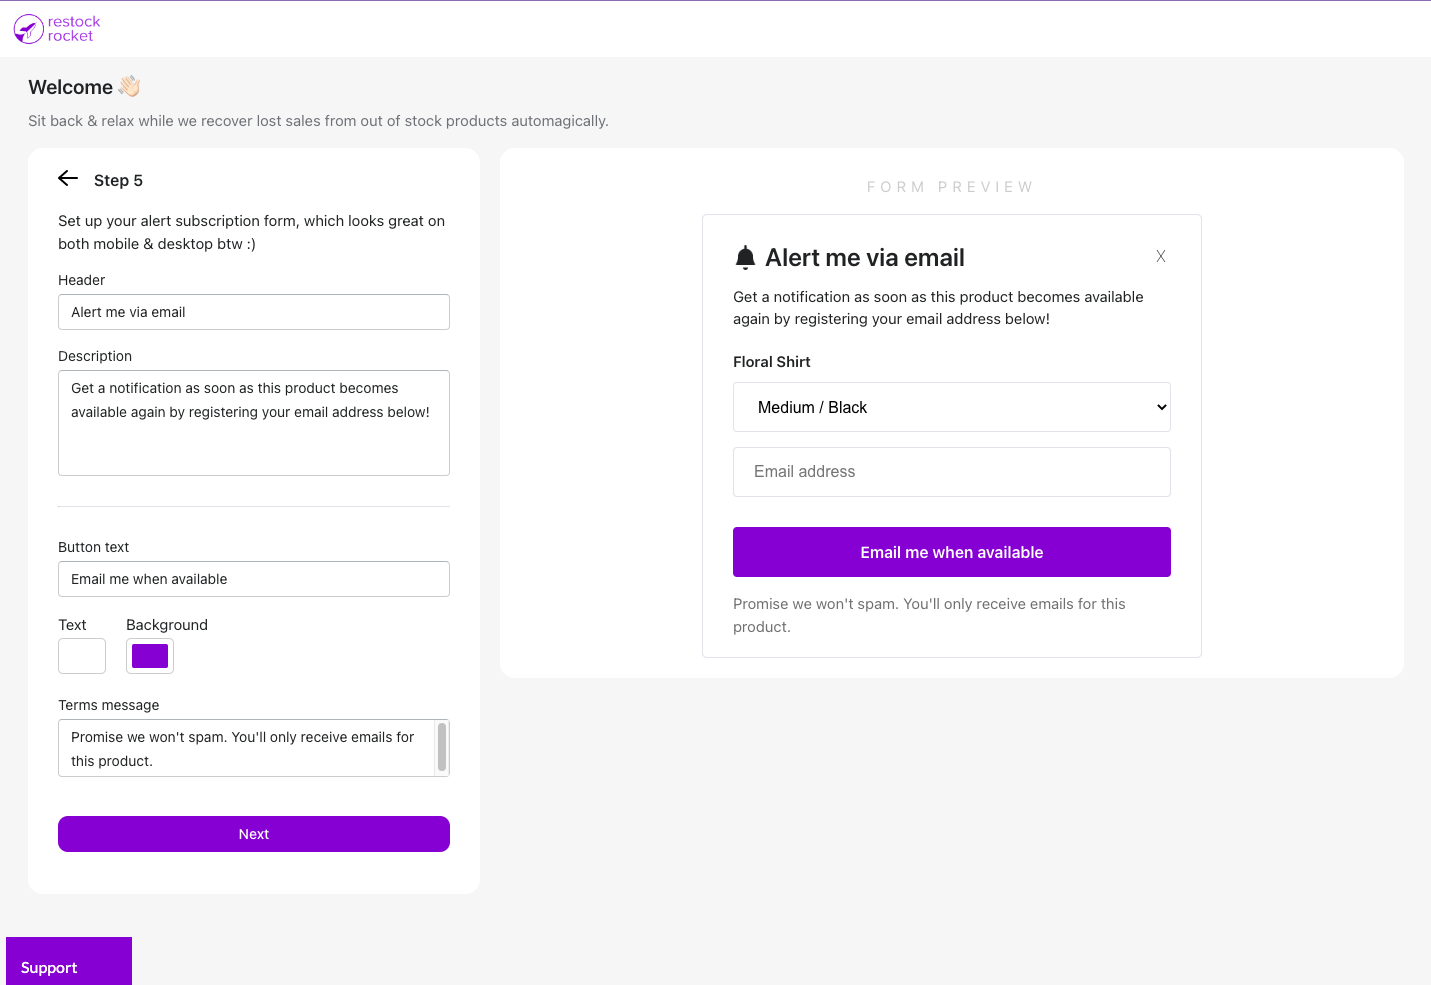
When you're done, you'll be able to configure your back in stock registration form.
Finally, select a plan that best fits your store's needs and that's it! You've now set up the button on your store and ready to receive back in stock notification requests from your customers.
If you run into any issues or if you have questions, please reach out to me via the 'Support' widget or at [email protected]